Tuesday, 19 September 2017

Quad Easel Card by DT Priyanka Thukral

Hello Everyone


Today I am over at Rainbow Craftykari Blog again with an inspiration post this time. This time I really wanted to try my hands at something new & different and something which I had never created before, thus I picked "QUAD-EASEL CARD" for my inspiration. I remember, when I saw this style of card for the very first time sometime back I got all itchy to try it but just couldnt work on it & with this inspiration post I knew I had to had to try my hands at this quad easel style.

This style gives you alot of flexibility to experiment with themes, combinations etc. I chose to go ahead with the love theme...! For the base, I began with taking a black cardstock in size 11"*11" for the base {ref: Picture(a)} & than cut out 4 strips in size 5"*10" and then folded them into half (scored at 5")  {ref: Picture (b)} I further scored one side of the folded cards diagonally {ref: Picture(c)}. Then I cut out 4 squares in the size 5"*5" {ref: Picture(d)}. I then took patterned papers from papericious & cut them accordingly to attach to the base of my easel card. For the base I cut the patterned paper into 10.5"*10.5" & the remaining 4 patterened papers in 4.8"*4.8". I adhered the patterened papers onto the black cardstocks of the respective sizes & then adhered the 4 cards onto the base {ref: Picture(e)} Our base is now ready to be embellished.

Picture (a) 

picture (b)


Picture (c) 

picture (d)


I embellished it flap by flap in a way that each flap coorinates with the other. (tip: it is important to think through how you are going to embellish the flaps because devaiting from the theme can kill the entire look of the card, thus it is very important that all flaps should compliment each other & be in sync) I embellished my flaps using Spellbinders Nestabilities Fleur De Lis Square die, resins, die cuts, flowers, heat embossed sentiment from fiskars stamp set, pearls, rhinestones. I didnt want to go overboard with my embelishments thus I kept them simple & light. Using a double sided foam tape I adhered the small sentiments on the inside of the cards to make an easel panel (with support of these our cards will stand to make an easel structure) our Quad Easel Card is ready! Check out some close up pictures:

Top view with the closed flaps 


aerial view of the quad easel cards

Some Close Ups: 


sentiment using heat embossing technique

Embellished with resin frame & flowers

Heat Embossed Sentiment using fiskars stamp

couple die cut using silhouette cameo


Material used:
- Black Cardstock
- Papericious: Its peach time patterened paper
- fiskars stamp
- resin frame, resin flowers
- mulberry flowers
- Spellbinders Nestabilities Fleur De Lis Square Die
- Die cuts (boy& girl) on silhouette
- Rhinestones
- Black Distress inks
- We r Memory keepers cut & score board
- Ranger embossing powder (copper)
- versamark embossing ink
- Heat tool

 Almost all these materials are available in the store with us at Rainbow Craftykari

Hope you liked my project & enjoyed it!
Dont forget to leave your feedback & suggestions & also tag us whenever you try it out. Would love to see your take on this.

 Hugs Priyanka Thukral

Wednesday, 6 September 2017

Pop Up Boxed Card Tutorial - DT Priyanka Thukral

Hello Everyone, Today I am over again at the Rainbow Craftykari Blog and this time I am here with a step by step tutorial on how to make a Pop-Up Box. I have been doing a lot of pop-up boxes in the last few months and I have always loved working on these..! Pop Up boxes are a flat card that opens up to a box with popping out elements.

To give you a glimpse of the project:

Let's begin: 

Step1 for the base: I picked up a 10.5*6" cardstock & scored it at 2.5",5",7.5",10". Then I rotated the cardstock & scored at 2.5" which makes my upper part of the card (2.5") and bottom half (3.5").The last flap left in the end will be glued to the inner side to make the box. Following which I cut the scored lines half way through till 2.5" from the top to make the flaps.

Step2: I then cut two strips measuring 3.5*1" and scored them at 0.5" and 3". These go inside the pop-up box to hold the embellishments in the center.

Step3: Now I picked out the patterned papers from my stash and cut them in the sizes same as each section on inside & outside and adhere them to the box.

Step 4: Then I took Clearly Besotted stamp & stamped the gorgeous little animals & sentiments and colored them using aqua water color pencils & fussy cut them.

Step5: Now using the acetate sheets (easily available in the local stationary shops) I cut these into thin strips. These are used to add the elements outside of the box which gives an impression as if the elements are hanging in the air because of the transparency of these acetate sheets.


Step6: And the final step I added all the fussy cut elements onto the pop-up box and on the acetate sheets using glossy accents.


And TADA!!!! the box is ready... :D :D

Isn't it looking very cute??? Enjoy a few more close up pictures.


Materials Used: 1. Black Card stock 2. Clearly Besotted Stamp set 3. Versa ink onyx3. Patterned Papers ( from the stash) 4. Tim Holtz Distress inks  5. Aqua Watercolour pencils 6. Glossy Accent7. Fevicol  8. Acetate Sheet Hope you all liked the card & enjoyed the tutorial. Until next time. ;) Don't forget to participate in our ongoing challenge. Link your projects here.

Priyanka Thukral

Friday, 18 August 2017

Altered Gift Box - DT Priyanka Thukral

Hello Everyone :)

I am over at Rainbow Craftykari Blog today to share my very first inspiration post as the DT member for Rainbow Craftykari. I am Elated..!! and I hope to stand up to the expectations laid down on me.

Today I have an Altered MDF wooden box to share as a part of my inspiration project.
Altered mdf projects have been my favourites since forever & no wonder I begin my term with one of these.


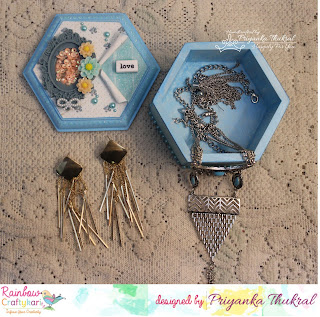
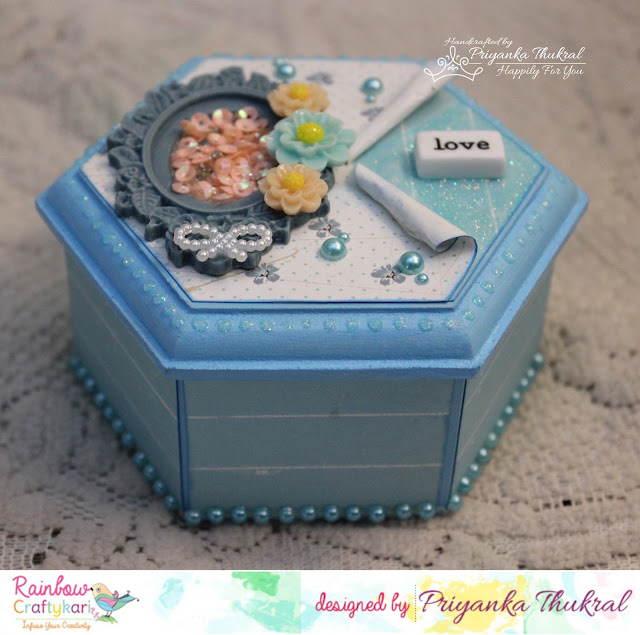
Here is the complete picture of my project.


For this project I picked up a hexagonal mdf box (another current favourite of mine.. :P ) I began with painting the base with gesso which works as a primer (tip: Gesso creates a coat on the base of the wooden material that  holds the paint otherwise the wood absorbs the colour).
Next I painted the box with blue acrylic colour. I chose coordinating patterened papers from eno greetings paper pack, cut them in the desired size & distressed them on the edges. For the cover I had cut the paper from one end till the center point & rolled the two sides on the opposite sides.
On the exposed part of the base I added glitter using stickles in the coordinating colour & a word tile over it.
on the other part I added a resin oval frame & sequince in the middle of it & adorned it with the resin flowers & bows.
On the sides I again used stickles in the same colour to give an embossed look (I love how they look like tiny droplets resting on the edge) & added rhinestones to lift up the whole look.


and tada..!! the box is done.. :)
The box is perfect to gift a watch to someone or keep it on your dresser as a jewellery box, can be used in multipurpose ways.

Check out some more close up pictures


Supplies Used: 

- Mdf hexagonal shaped box
- Gesso by Camel
- Blue Acrylic paint by fevicryl
- Eno Greetings Patterend papers
- Word Tile
- Resin frame - Oval
- Resin flowers
- Bow
-Stickles(aqua colour)
-Rhinestones
-Distress ink
-glossy accent

Almost all the above mentioned products are available at Rainbow Craftykari store or you can also pre-order by sending an email at rainbowcraftykari@gmail.com

Hope you liked my project.


Priyanka Thukral
www.happilyforu.blogspot.in


Monday, 8 May 2017

Alphabet Love Book

"They say you fall in love with the most unexpected person at the most unexpected time"

Love is one of the most beautiful & most purest thing to ever witness, & today I m sharing with you a mini album with a page dedicated to the person defined with each alphabet.

This alphabet love book/ mini album has 26 pages with each page defining a special moment for the couple through every alphabet.

It was the very first for us & the outcome was just so satisfying that like every other product we do it was too hard to part ways with this one too.

This book completely showcases the beginnings to all the happy endings.. with the cute little notes & quirky cliparts all handmade.
Witnessing this cute love story & getting to capture it through our creation we feel so happy that we could be a part of their journey in some way..


Do check out the video & pictures here :


Hope You liked it.. 
Dont forget to leave your comments & feedback
TIA:) 
PRIYANKA